The commercial sign business is a lot of things, but one thing it isn't is boring. There are so many different ways to do things, materials to work with, and such a variety of sign techniques that one can never learn it all. And though there are many, many types of sign work, there are nearly just as many different ways to install the sign jobs we produce.
商业化的标识业务包含很多加工程序,但是钻孔却不在标识业务之内。制作标识的方法和材料有很多种,一个人不可能掌握所有标识制作技巧。即使有许多不同类型的标识制作项目,我们也会用多种不同的方法来安装制作标识。
Some of our sign installs require coming up with ways to hide the hardware or fasteners, in order to produce a more aesthetic and less “mechanical” look to what we're installing. For this month’s Shop Talk, we'll look at a few of the techniques we might use to hide fasteners or fabricate signs that have virtually none of them showing on the final product.
制作安装标识时需要采取措施将五金硬件或紧固件隐藏起来,这样就会呈现出一个更加美观的标识外形。本月的标识探讨,我们就来介绍几种可能使用到的隐藏紧固件的方法。
One of the simplest ways of doing this for some types of dimensional signage is shown in the first couple of illustrations, and that is the old “key hole” slot, good for hanging logos and other sign items particularly if they are going indoors.
隐藏立体标识上五金固件的其中一个最简单的方法,是我们要介绍的第一个标识产品中用到的,在标识内部会有老式的“键孔”槽,用来悬挂固定商标和其他室内标识。
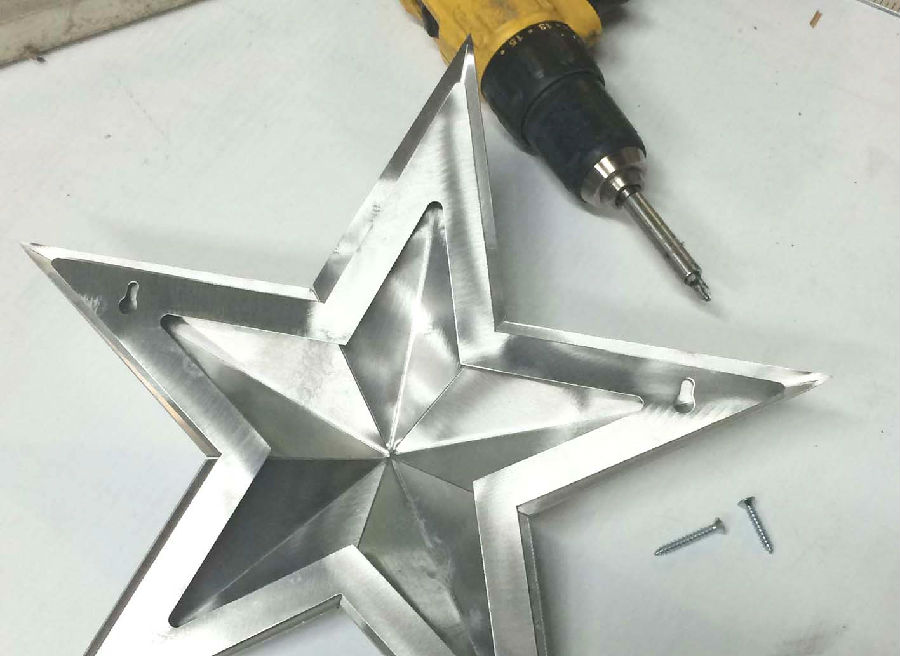
The dimensional star in the photo is part of a wall display we have made several of for county offices and courtrooms at our local Gregg County, Texas, courthouse in our hometown of Longview. In this display the smaller letters were mounted with double-sided tape, the larger letters and circles were installed with short studs, and the three-dimensional star used backplates which incorporated two key-hole slots which fit over screw heads left a bit offset from the wall.
图片中的立体星星是墙面展示的一部分,德克萨斯州格雷格县政府办公楼和法庭已经安装了这样的墙面展示。在这个展示中,较小的字母用双面胶来固定,较大的字母和圆形物用短螺栓固定,立体星星使用背面板固定,该背面板上有两个键孔槽,螺钉头可以从槽内穿过去,并且与墙面之间有一定距离。
This simple system is hard to beat, and easy to accomplish. Of course an accurate pattern is used to show exactly where (emphasis on “exactly”) to place the screws.
这种简单的方式很实用,并且很容易实现,当然,要用精密模具来校准螺钉准确穿过键孔的位置(重点是“准确地”)。
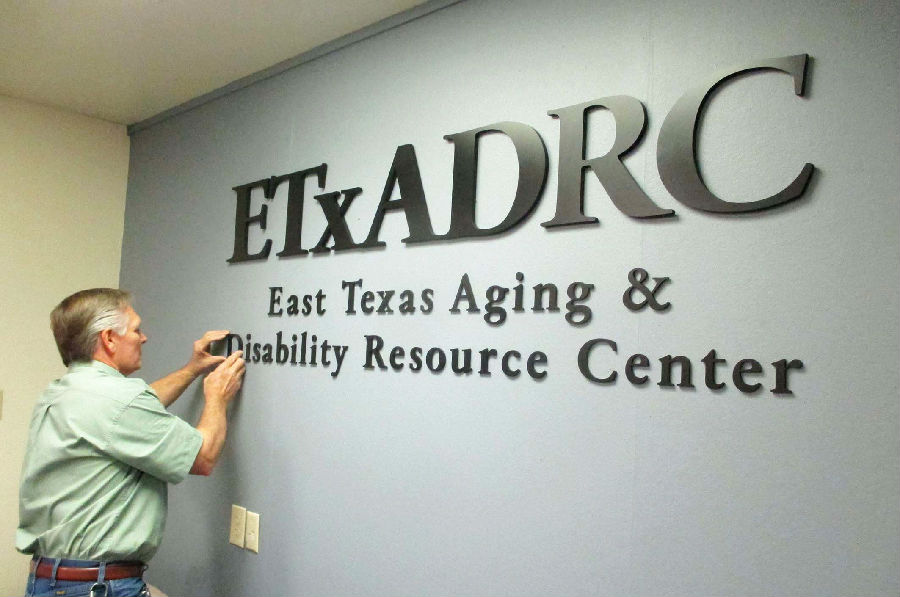
A display we did for another county service illustrates a simple way to hide the hardware on letters that are not going to be stud mounted and might be a bit heavy for double sided tape.
我们为另一个县做的背影墙,采用一种简单的方法来隐藏字母上的五金固件,这种方法不再使用螺栓固定,而是用双面胶来固定。
Part of this job involved installing a lot of small black acrylic letters, spray painted to a nice satin black finish, and these were certainly light enough to install with double-sided tape. But the larger letters were 3/8” thick solid acrylic and a bit too heavy to feel confident in mounting them with just tape and any type of glue would make a mess on this office wall.
这个展示中的一部分是许多小型黑色亚克力字母,将其喷涂成表面美观光滑的黑色样式,并且它们很轻便,用双面胶来固定安装是最佳选择。但是较大的字母是用3/8”厚的固体亚克力板做成的,他们过于笨重,不适合用双面胶来固定,也不能用其他类型的胶来固定,因为胶会把墙面弄脏。
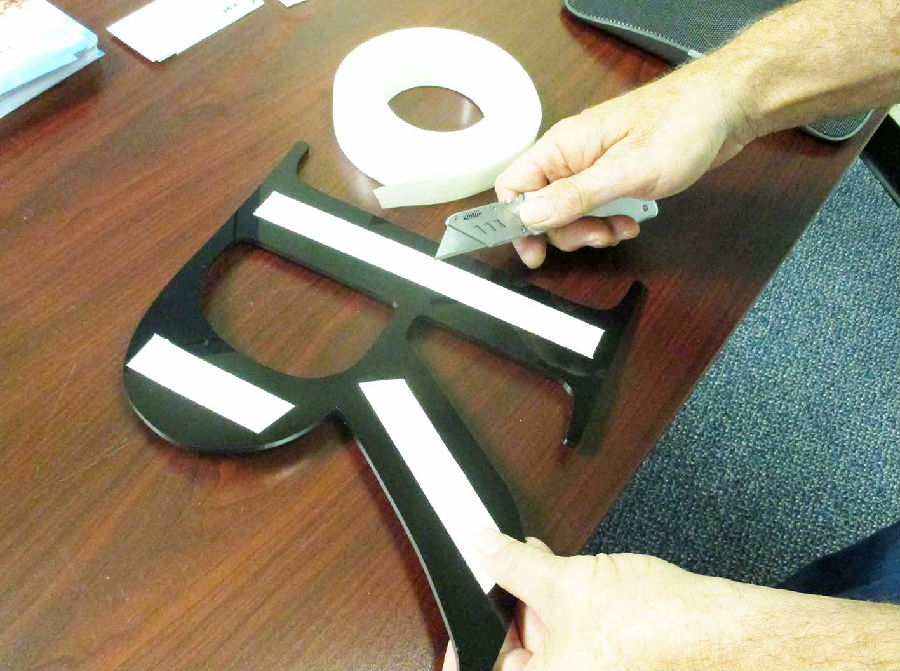
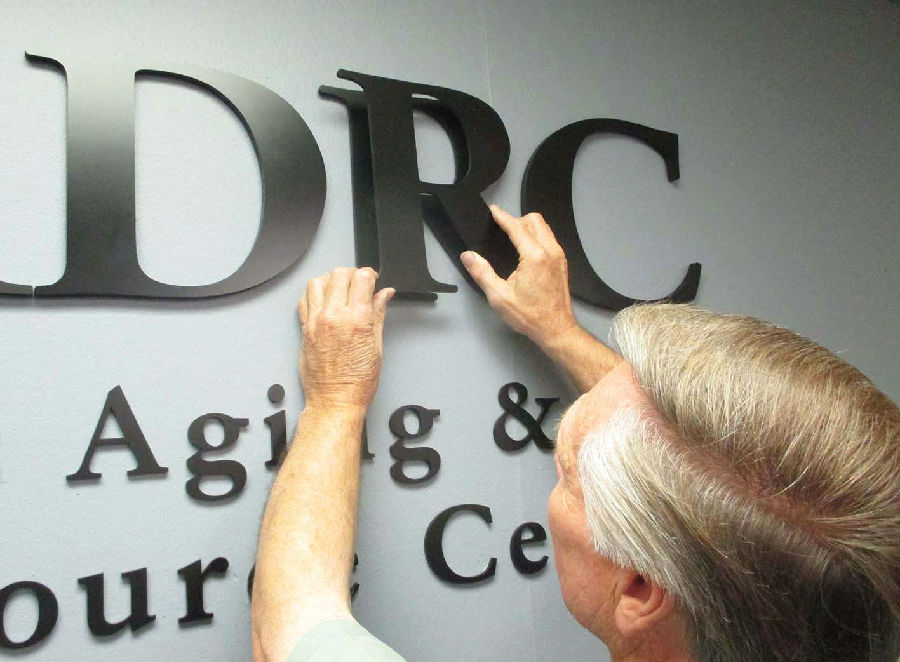
The lettering was cut very accurately and quickly on our Trotec laser, and with that type of precision I decided to make the larger and thicker letters in two layers, that is each letter was a two-part item, made from 1/4” acrylic x 2 = letters 1/2” thick.
用Trotec激光切割设备能够准确快速地切割这些字母,在这样的切割精度下,我决定做成双层更大更厚的字母,也就是每个字母都是由两部分组成——两块1/4”厚的相同亚克力板组成1/2”厚的字母。

The bottom letter layer was painted only on its edges, since that's all that would show, and each letter was drilled and each hole tapered with a countersink bit. The heads of the small wood screws that were used to simply screw the letters to the sheetrock (no anchors were used or needed) were flush with the surface or recessed slightly. The top layer of each letter is of course ¼” thick and easily adhered to the screw-mounted layer with thin double-sided tape (we used banner tape for this). The final install showed no hardware at all, though there were really quite a few well-hidden screws.
每个字母的第一层只喷涂其边缘,因为它在底部,所以能显示出来的只有其边缘,其他部分都被第二层字母覆盖了。每个字母都被钻孔并用埋头钻将其固定好。用于固定字母到石膏灰胶纸夹板上的小型木制螺钉头,要跟字母表面齐平或稍微凹进去一些。每个字母第二层的厚度都是1/4”,并且易用双面胶将其粘贴在已经固定好的第一层字母上。最终安装好之后根本看不到五金固件。
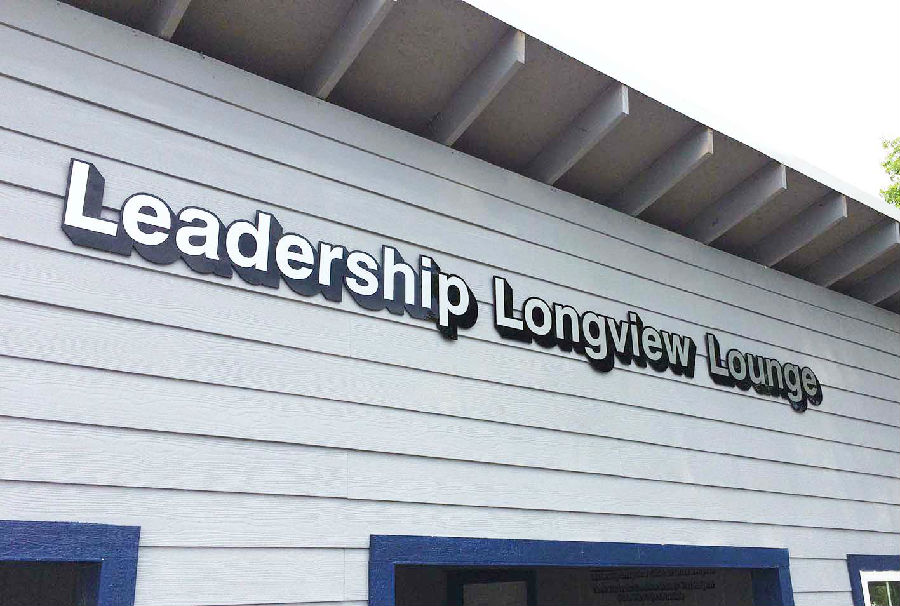
The “Leadership Longview Lounge,” which is a teacher's break room at an outdoor teaching facility designed to teach kids pedestrian safety, was done much in a slightly different way. In this case the black acrylic lettering units, which have hp silver vinyl graphics applied to them, were not to show any screws. But because of the uneven “plank” surface they went on, using adhesive was out of the question. Stud mounting with pads was an option, but we chose to go a different route.
“Leadership Longview Lounge”是一个教师在户外教学活动中的休息室,该户外教学主要是教授学生行人交通安全守则,并以一种不同寻常的方式开展。这个标识案例中,在黑色亚克力板上是惠普银色乙烯基字母,且看不到任何螺钉固件。但是由于其安装在表面不均匀的板子上,所以不能使用粘合剂来固定。可以选择用大头钉来固定。
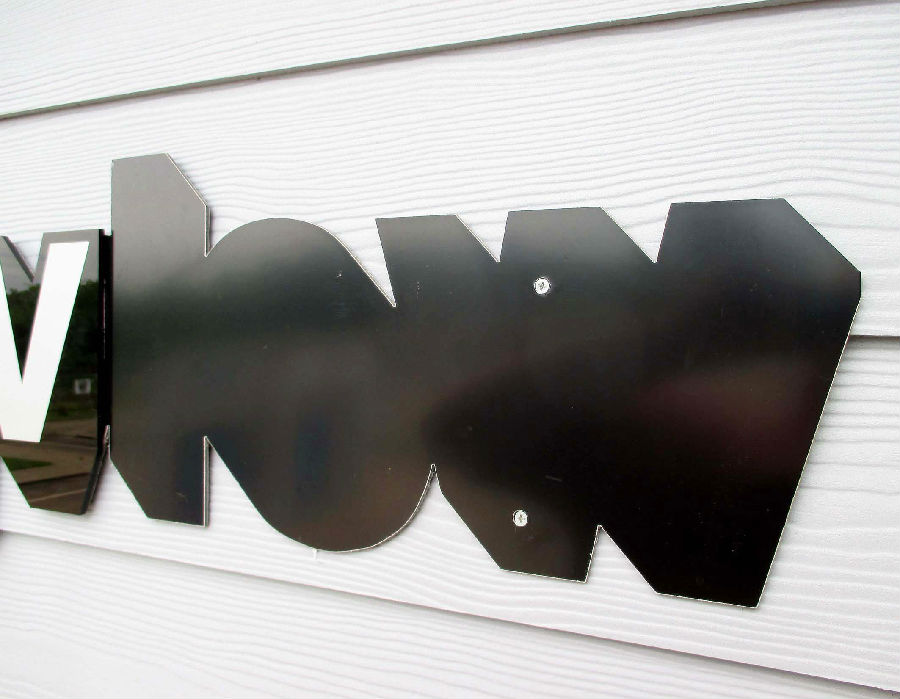
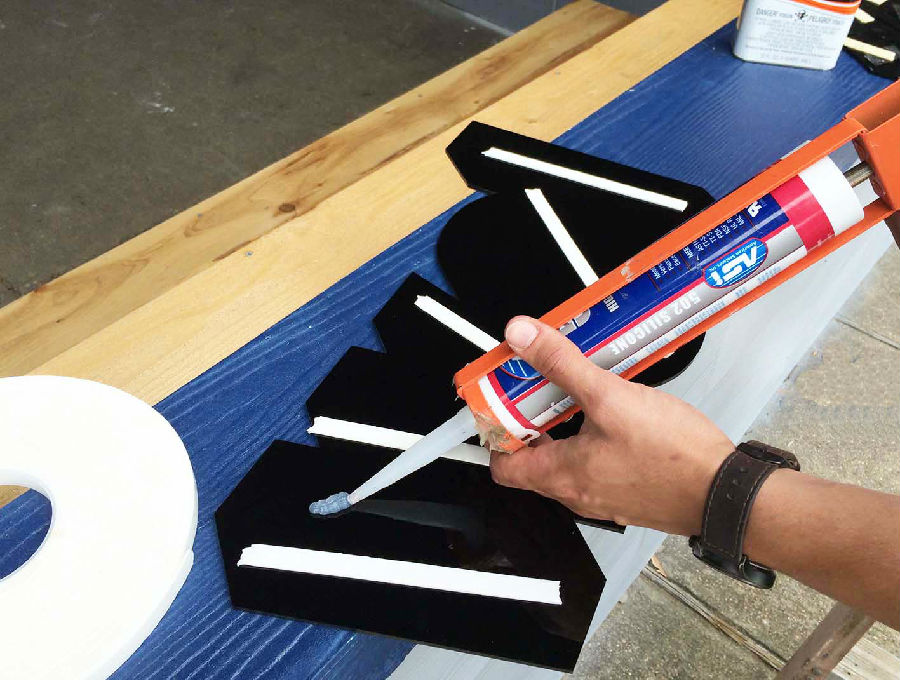
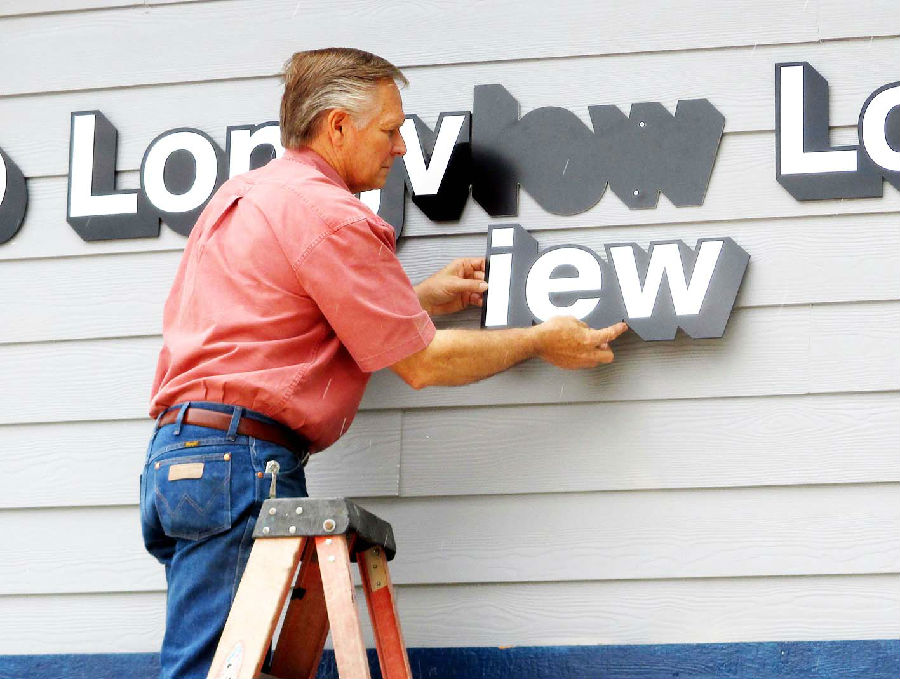
The solution was to put an innexpensive backplate behind the cutout graphic parts, cut with enough of an inline so the visible graphics hide them completely. Since none of this would show, screws could be used to mount the backplates quite securely. Once that was done, the real cutout acrylic graphics were permanently installed using both double-sided tape and 100 percent silicone sealant-adhesive, with no hardware showing at all.
我们选择的方法是在切割好的图文后面安装一个便宜的背面板,将其切割成内联式外形,以便于图文能够将其完全隐藏起来,然后用螺钉将背面板牢牢地固定好。一旦这一步骤完成,就能用双面胶和100%硅酮密封粘胶将切割好的亚克力图文永久地固定,并且不会露出任何五金固件。
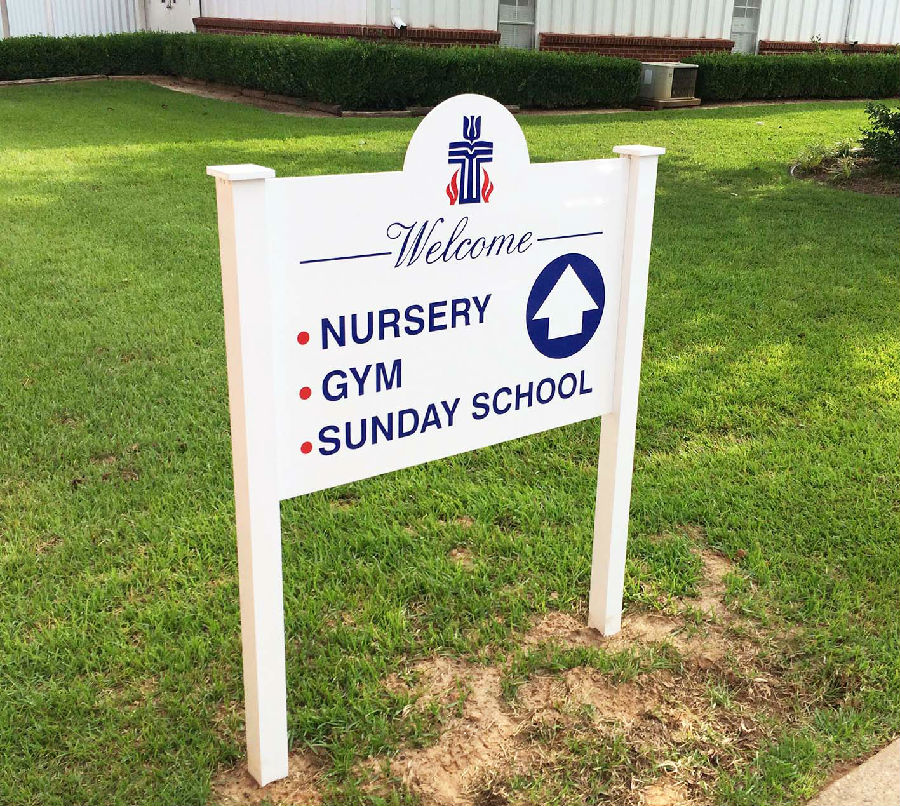
We make shop-fabricated signs that have little or no exposed hardware. An example of a set of small architectural signs we made for a local church will serve as good illustration. Architectural signs like this -- with faces made from one sheet of material and not dimensional -- are easily fabricated with even basic tools.
我们也制作看不到五金固件的商铺组合标识。我们为当地教堂做的小型建筑标识就可以当做一个很好的案例。像这样由一块材料板做成的非立体建筑标识,用基本的制作工具就可以很容易实现。


The key, of course, is the slotted square tubing legs. The slots on this sign were cut on a CNC machine but could just as easily be cut with a table saw or router. The slot is approximately 1/32” wider than the thickness of the face material (in this case we used 3/16” aluminum sheet for the faces), and the easiest way to get everything exactly right is to make the legs an inch or two taller than needed and slot them an inch or two longer than needed, also. After temporarily fitting the faces in place, simply mark the legs to the perfect length, creating a precision slot.
此标识的关键部分是凹槽方形支柱。标识中方形支柱的凹槽是用CNC数控设备加工成的,大概比主面板厚1/32”,主面板用的是3/16”厚的铝型材。将所有的零件精确地组合起来的最高效的方法是,把支柱和凹槽做到比实际多出一到两英寸的距离。先将主面板临时安装在适当的位置,简单做个标记,记录固定支柱的最佳位置,然后再确定精准的开槽位置。

Of course, what holds the faces in place in the grooved legs are two “plugs” or fittings at each end of the faces, one near the top and one near the bottom, which can be bolted or welded into place. In this case the aluminum plugs fit into notches cut into the faces and welded in. If welding aluminum is not practical, these fittings can be made from short pieces of aluminum angle and secured with small machine bolts or rivets, very simple and just as effective.
同时,将主面板固定在方形支柱上的是两个柱帽,将其分别安装在主面板的两端,其中一个在顶部附近,另一个在底部附近,然后将铝制柱帽塞进凹槽内。如果不方便焊接铝制品,那么这些配件可以用小螺栓或铆钉将短小的铝片固定在一起来实现。

For this sign, each post cap serves as a retainer, and they are held in place with two small rivets each. Signs of this type are clean and professional in their appearance, show virtually no hardware, but are actually easy to fabricate.
对此标识来说,柱帽是用来固定标识的,用两个小铆钉将其安装在适当的位置。这种类型的标识外观看起来干净且专业,没有暴露在外的五金固件,且很容易实现。
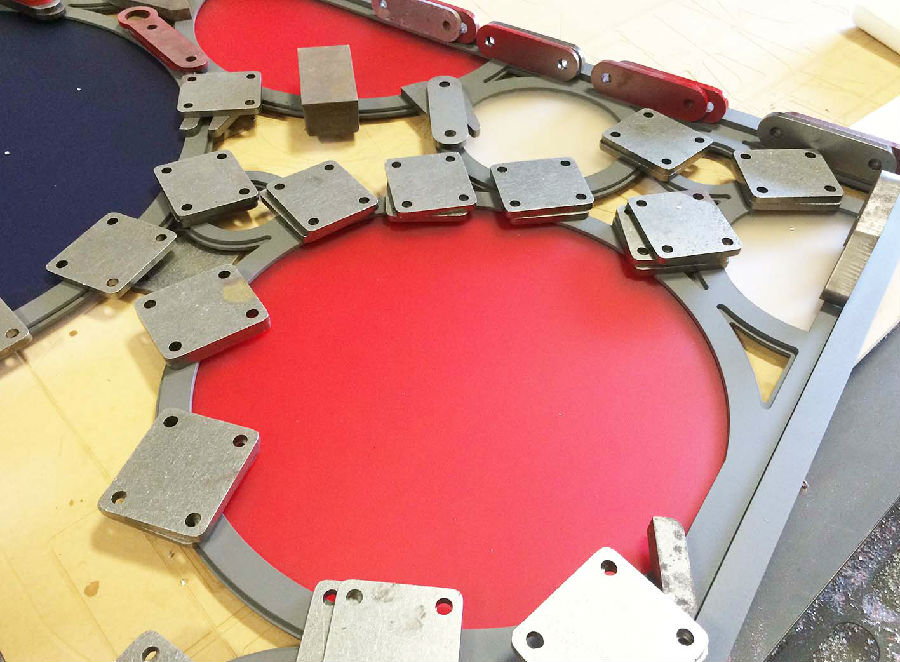
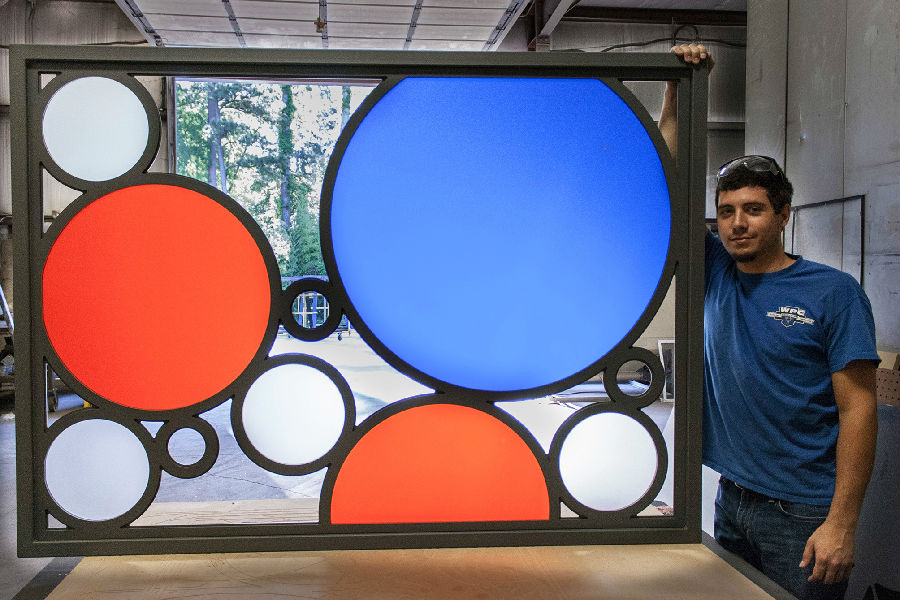
One last illustration is a job we did lately that isn’t really a sign, but is a decorative panel or wall divider that we built several of for multiple restaurant locations. This was an artistically designed (by their interior designer) panel that had a square tubing frame, and translucent acrylic pieces that fit in a three-layer framework.
最后一个案例是我们最近完成的项目,准确地说,它并不是一个标识,而是一个装饰性的面板或屏风。该屏风设计地很有艺术特色,它是一个方形的框架,中间是半透明的亚克力嵌板。
The center unit of the interior frame that would not show was cut very precisely to match the circle shaped acrylic inserts and the inside dimension of the rectangular frame. This was to be sandwiched by two similar but overlapping frame pieces, one for the right side and one for the left, which would serve as retainers and visible face elements of this custom unit and in which would be no visible hardware.
内部框架的中心部分要进行准确地切割,来匹配圆形亚克力嵌版和矩形框架的内部尺寸。它被夹在两个相似但重叠在一起的嵌板中间,一个在右边,一个在左边,它们起固定的作用,同时也是该屏风外观呈现的一部分,并且看不到任何五金固件。
The process was to weld the center framework in the rectangular tubing frame, and working from the inside, tack weld one of the retainer frame members in place with welds that again would not show.
主要制作过程是将中心框架焊接到矩形管道框架上,从内部开始焊接,用焊接的方式将其中一个支撑元件焊接在适当的位置,焊好之后将其他的也都进行点焊。
But the final retaining frame member also needed to show no fasteners of any type, so the solution had to be some type of adhesive of course. But, since the final assembly of the last section of the frame would go on after all parts were powder coated, the surfaces being adhered together would covered with a tough film of powder coating. This powder, and many others, was actually a heat cured polyester coating, the most common chemistry for powder coated finishes.
最后的支撑框架同样不能露出任何类型的固件,因此要用粘合剂来固定。最后的装配环节要在所有零件都完成粉末涂层之后再进行,粘合好的表面也要覆盖粉末涂层漆膜。这种粉末实际上就是最常用的热固化聚酯涂层。
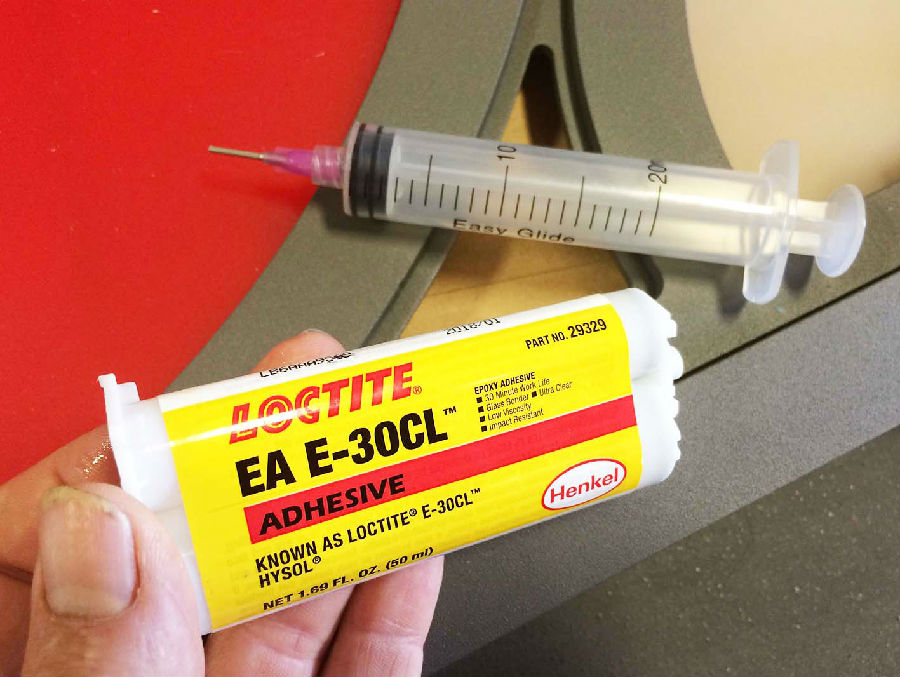
So, the proper adhesive was one specifically formulated for plastic (polyester), not metal or even paint. Slade did some research and found a suitable two-part adhesive made by LockTite, mixed it and applied it carefully using a large syringe. The cure time was a few hours, so it was easy to work with.
因此,合适的粘合剂是一种特别为塑料(聚酯)定制成的,不适用于金属或涂料。斯莱德做了一些调查并发现了一种合适的二元粘合剂,由LockTite生产,用大的注射器小心地混合使用。固化时只需要几个小时,所以使用起来十分方便。
This unusual item, once finished showed no fasteners at all. Most of the fastening was done with hidden welds, and the last part with an appropriate and specific adhesive.
这个特殊的产品在完成之后同样看不到五金固件。因为大部分固定步骤都是用可隐藏的点焊完成的,最后步骤是用特殊的粘合剂实现的。
These are just a few ways to get the hardware out of sight on various sign projects, and for sure there are many others. The ones shown here are easy and add little cost, and are worth the extra effort. After all, we can all appreciate a clean, professional sign job when we see one, especially if it’s one of ours.
这些只是众多标识项目中隐藏五金固件的几种方法,毫无疑问,还有很多其他方法来隐藏五金固件。这里提到的都是简单且无需额外成本的方法。毕竟,当我们看到一个标识,尤其是我们自己制作的,都想让它呈现出一种干净专业的外观展示。


